Pages

Tuesday, December 4, 2012

Do Justice Love Mercy and Walk Humbly

Resurrecting my love for typography and whimsy again - and the need for decaf coffee to keep a steady hand! I definitely want to do more paintings with hand lettering. I love the slight imperfections that add a touch of personality & charm. You just can't get that with computer fonts.

Can't you see this in a child's room or in a sunny spot in your kitchen? What a cheerful way to bring the Bible to life!


Watercolor, on 11x17", image is approx. 8x13"
I'm putting this one up for sale. $75 plus shipping

Sunday, December 2, 2012

Christmas preparations

Our house has been a-flutter with getting ready for Christmas! Somehow, Thanksgiving whizzed by and now we're already into Advent! It crept up on us, which makes me glad I don't do a big advent calendar countdown complete with craftiness and activities each day for the kids. I took that pressure off myself awhile ago; let's me enjoy the days leading up to Christmas a bit more. (I put the pressure on AFTER Christmas - we do celebrate the 12 days of Christmas before Epiphany, but I'll keep you in suspense until then). We do enjoy making lots of projects together, but it's just easier if I don't have a one-a-day mentality. Four kids messing in paint and glitter and popscicle sticks for just one afternoon is enough to make me think fighting the mall crowds might be more pleasant. *shudders*

Today was a quieter, more focused craft time with my daughter. We spent a couple hours with the watercolors. She painted a phoenix. I was able to prep a canvas and finish two other paintings started earlier. Here's one of them, ready to be framed as a gift for my polar bear loving son.


I've been playing around with various illustration styles, trying to find something that feels like "me." I'm not sure this is it, but I think I'm getting close!


Wednesday, October 17, 2012

Decorating my Kitchen

I spend almost the entirety of every day in my kitchen. Not only do I feed 6 hungry people from there, but it's homeschool central and the room with the most natural light. When we bought this house the large-ish kitchen was a major selling point. I do lots of entertaining. It's not uncommon for us to have 30-60 people over, and we all know that no matter how comfy the chairs are in the rest of the house, the kitchen is where everyone ends up hanging out! 

Since I'm in this one room so much, it was time it became the room I loved. I want it to be a fun and energetic place that will be a joy for my kids and friends to visit. I've slowly collected some fun vintage pieces - the farm table that my in-laws used as their first dining table, a schoolhouse pendant light that my parents found in an antique shop in northern MI, an old bench that's perfectly weathered. There are a few things in the kitchen I do not love: 1980's era wallpaper, mismatched shades of dark wood trim, aging oak cabinets, and a poorly laid faux-wood vinyl floor. Replacing flooring and painting cabinets are intimidating jobs; I'm not sure how much I can tackle at once and keep the family running. They're on my "eventually" list. 

Using what we already have (red walls, table, light) as a springboard, I pulled together a collage to get an idea of where I'm going with this design. A hint of retro kitsch with a love of vintage linens thrown in. I can't wait to start making this room come to life! 


Friday, October 12, 2012

A New Wreath to Welcome You

Autumn feels to be slow in coming in our parts - but I guess even if it doesn't feel like fall, I can at least decorate for it! A few supplies from Michaels, plus acrylic paints and my trusty glue gun....a festive fall wreath that will carry us through Thanksgiving.

I wanted white gourds but couldn't find any - so I painted some! They're not perfect, but I think it's still beautiful. Yeah, you can see some fingerprints in the paint. Now you know it's homemade, which adds to the charm, right???? I was thrilled to find a black over-the-door wreath hanger for $5 at Target - mixed in with all the creepy Halloween decor! You can't even see it against our door.

My favorite part of fall decorating is all the great textures - crispy leaves, twisty branches, striped feathers, smooth pumpkins. Add in a soft flannel shirt and wool sweater and I'm a happy gal!

What's your favorite fall texture?

Monday, October 1, 2012

Kids Clothing Week Challenge

As if I didn't have enough to do already - but you know a deadline is great for getting things accomplished! I'm signing up once again for the Kids Clothing Week Challenge (KCWC) over at Elsie Marley. One week of focused sewing, just for the kids' closets!

easy to join the fun - visit elsimarley.com and just leave a comment!
 
To prepare, I'm starting to make lists and gather inspiration of what I want to sew for my daughter and 3 sons. They're growing in leaps and bounds, so all the cute toddler patterns out there definitely don't work. It's a challenge finding size 7-14 kids' patterns, but I think a little ingenuity will carry us through.

I started pulling together some of my ideas and inspiration:

PJ pants, similar to these
long sleeve blouse, inspired by Rae's Pierrot Tunic
ruffled petticoat skirt
transform one of dad's shirts into a tunic/dress


Wednesday, September 12, 2012

Pillowcase PJs - for boys!

Sewing for boys - ugh. There are oodles of cute little girl patterns out there, a few for little boys, but for an 8 yr old? Not much exists. And I confess, I'm not adding to the online options, but I will share how I made PJ or lounge pants for my big boy out of a pair of pillowcases. (and you thought this was another pillowcase dress tutorial, didn't you?).

First find a pair of pillowcases - these were at the thrift shop for $1.50. That's a pretty affordable pair of PJ pants! I think they are king sized, which is great if you have a taller kid to sew for. You could easily do this with a sheet or an XL men's tshirt as well, just remember the hem will be the hem of the PJs!

Since I like to do as little work as possible, I use the hem of the pillowcase for the hem of the pants. This means my final project will require me to sew only 3 seams plus a waistband casing.

Each pillowcase will give you one leg. If you're making this for a toddler, you might be able to squeeze two legs out of one pillowcase! Lay the ironed pillowcase on the table.

Now for the cutting - I loosely based my pattern from a pattern I had in my stash, but honestly, you don't need one. Measure your kid's hips, and divide by 4. Remember to add some extra breathing room for ease! Add a seam allowance, too. Mark that width starting from the folded edge of the pillowcase. Now measure the rise - the distance from the child's waist to in between their legs. Again, add a couple inches because you want enough fabric at the top for a waist casing. Now cut a J shape from the rise mark toward the waist edge, removing about 2" of width. Clear as mud? This picture should help.
From the curved end of the J, cut down to the hem of the pants. You can either leave the legs straight or taper them in a bit. I tapered them in a little, but the hem opening is still very loose. We're going for lounge pants here, not leggings!


The last step for cutting is to make the J wider on one layer of each leg. This makes the back of the pants. Grab the top layer of one leg and cut as shown above, then grab the BOTTOM layer of the other leg and do  it again. You can see I put some pins by my fingers to mark the back so I wouldn't get confused.

The rest is easy sewing, and I got too caught up in it to remember to take pictures! Take one leg, as pictured above, and sew up the leg seam until you get to the J. Do the same for the other leg. I did french seams because I know my boy will wrestle and generally be rough on them. Plus, I love a finished seam!

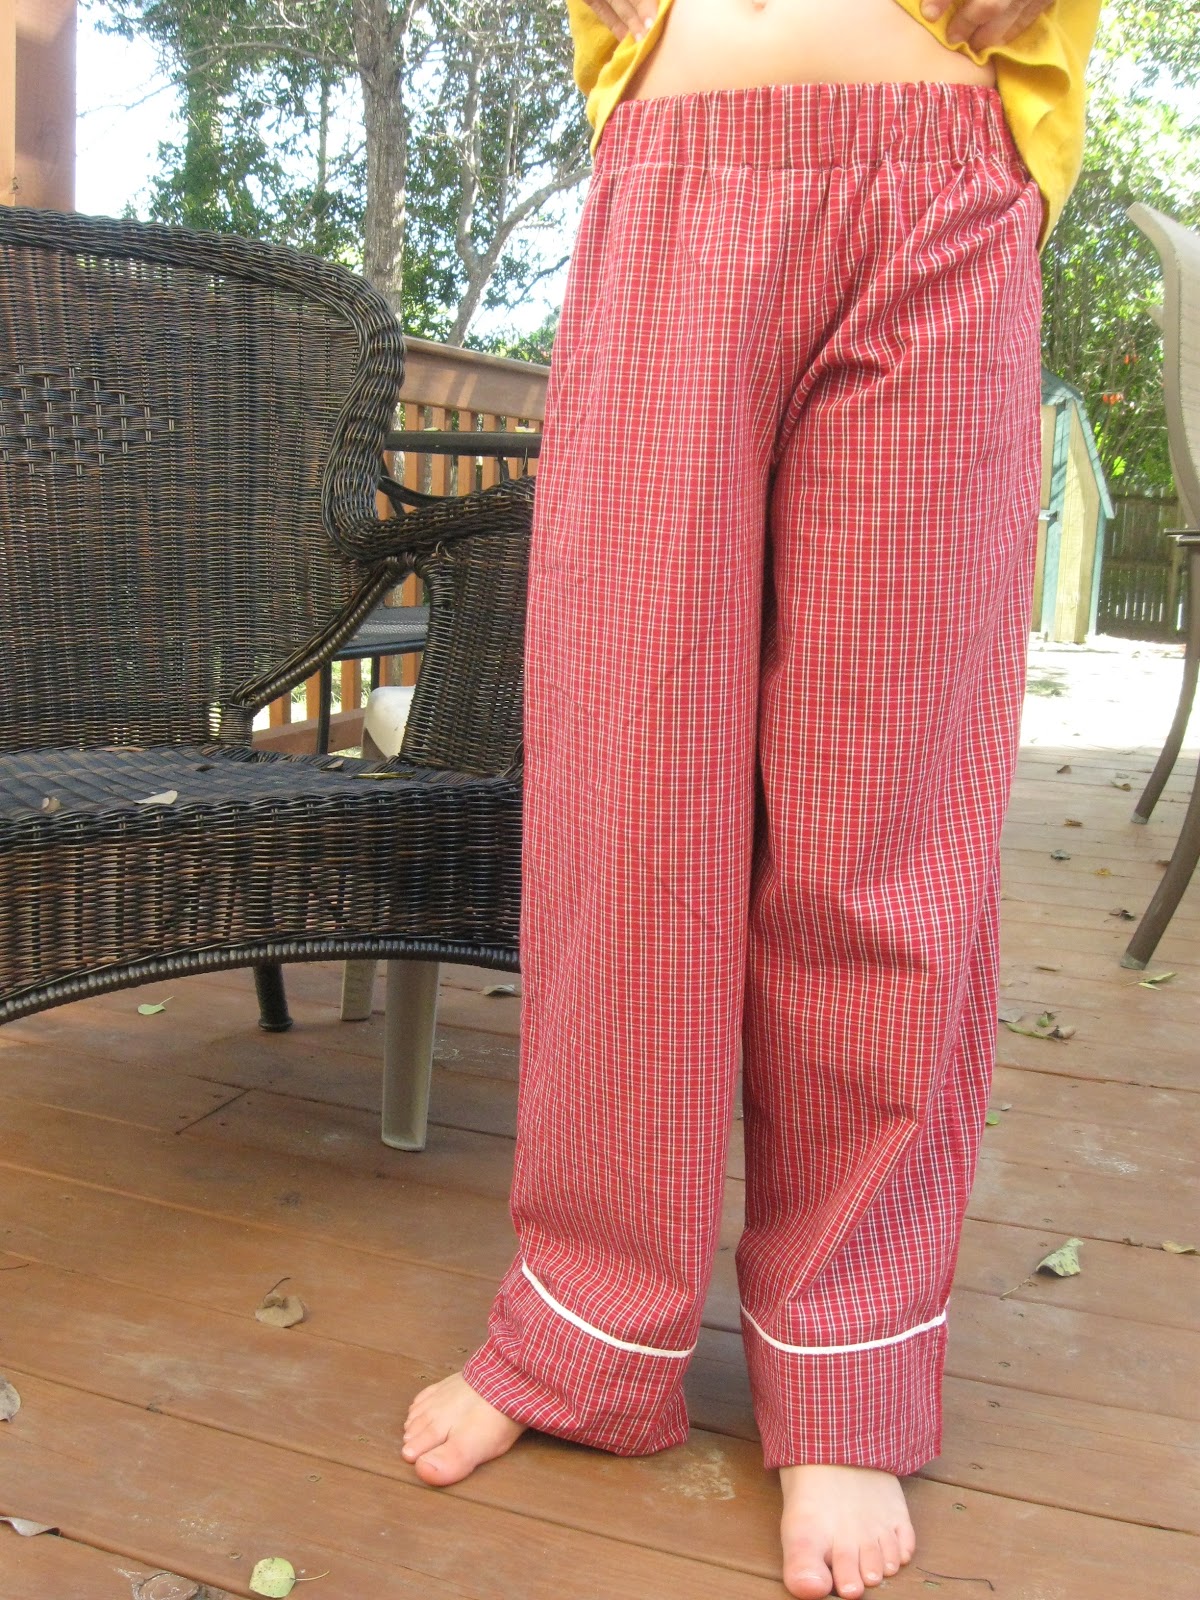
Now flip one leg right side out and slide that down into the other leg which is inside out - this makes a big tube. Line up the inseam and double stitch it. I also zigzagged the edges to prevent fraying. Open everything up right side out and press down 1/4" on the waist. I folded over another 2" and pressed to accommodate a 1 3/4" width elastic. Sew the casing, leave and opening, insert the elastic and sew it all closed. I also put in a small folded piece of ribbon as a tag to mark the backside.


A great finished product and a happy (but camera shy) boy!

Tuesday, August 28, 2012

Vengeful Veggies

We try to teach our kids good table manners, but any of you with little ones know this is a struggle. Lots of reminding, encouragement, correction. Do it over again. And again. And again. Slowly, they catch themselves with their elbows on the table or realize how awful they sound while telling the day's events to Dad through a mouthful of mashed potatoes.

One of the things we encourage our kids to do is not say bad things about the food or pull ugly faces if they don't like what they're eating. I discovered this creates some repressed emotions that can come out in funny ways!

Our youngest didn't care for the corn chowder I served at lunch today. Later he drew some pictures in his free time....pictures of vegetables. At first they were pretty benign.
Here's an apple, banana, blueberry, and onion....all congenial looking chaps. Over on the right is a carrot - with a big bite out of him! Looks like he's not happy about it either.

Then things started developing a bit.
Mr potato looks like he's fainted, and Mr SoupCan obviously isn't pleased with his lot in life. And then my boy's true feelings about his lunch came out.
Yes, this one needed interpretation from the artist. A watermelon and a blueberry are loading rotten onions into a machine that will hurl them at....? the chef? other foods? Notice the Swiss Cheese guillotine on top of the onion-tossing gizmo. Definitely some pent-up thoughts about our veggies in here!

These drawings made me laugh so hard - even if the little guy wasn't fond of what I made for lunch. We're working on that, day by day. But for now, I think I need to keep these. Maybe I'll transfer them to an apron as a reminder to me to make "happy food." 

Sunday, August 26, 2012

40 artists in a one-stall garage

What would you do with a warm, sticky summer morning? How about inviting 40 art students, all armed with wet paintbrushes, into your garage? Sound crazy? Exhausting? This month I've had the privilege of teaching two back to back art classes - yes, all in my little one-stall garage. It's a tight squeeze, but we can fit 20 students in at one time. We work around the wood pile, the chest freezer, and a couple work benches. A floor fan or two help relieve the Southern humidity. An occasional burst of wind blows our projects helter-skelter, sending up squeals and scampering feet. The garbage truck rumbles by. It's a challenge teaching 20 students at once, compounded by the fact that they range in age from preschoolers all the way up to adults. Yes, there are challenges and it's very exhausting, but the joy in seeing what their creative minds can do overcomes all that!

The biggest challenge has been obtaining supplies on a budget - a very tight budget. Most art classes offered in our city or through the parks/rec department are around $100/student for elementary aged kids. Ouch. I wanted to provide a similar experience that wouldn't break a family's bank. So I charged just $10 - and determined to provide supplies within that range. Yes, a challenge!

We're using lots of recycled materials - cereal boxes, brown paper bags, newspapers, scrap yarn, twigs, borrowed brushes. I asked each student to bring the bare minimum: a pencil and scissors. I purchased Sharpies, gel pens, glue sticks, various papers, and paint (turns out to be too much paint!).


my own kids willing test out some of my ideas

Up until now, I've only taught drawing. But after doing that with about 100 students, I was ready for a new challenge. Recently I've rediscovered the joy of painting and mixing media. The projects demonstrated by That Artist Woman helped shape the direction for this class, too. Here's an example of last week's project - mixed media owls with woven eyes.
All of our classes have been focusing on creating pattern and textures. The goal is to introduce new techniques that the students can  use in their own creations. I try to keep the projects simple enough for little hands (with help from Moms), yet offer enough creative freedom to challenge older kids. So far the results have been great! 

There's one class remaining - I'm still concocting our lesson plan, but so far I know it will involve cereal boxes and color theory. And popscicles.....looks like it'll be another hot August day!

Tuesday, August 7, 2012

Trinity Rolls

One of my favorite dinner rolls to make are cute little knots - we call them Trinity Rolls because we usually have them with our Saturday night Sabbath Feasts. With a bit of homemade jam or cinnamon honey butter, these are a delightful way to ring in the Lord's Day!


My eight year old son mixed the dough - his first attempt at bread dough! This recipe makes a lovely smooth dough, almost silk-like. Kneading it by hand is a pleasure! We let his dough rise in the fridge overnight, and in the morning I tied them into knots and let them rise a second time at room temperature. I'm learning to not rush the second rise - we like our rolls light and fluffy!

Since there are a lot of bare walls in my kitchen, I thought I'd illustrate some of our family's favorite recipes to frame. My daughter is illustrating some of her favorite recipes, too!

Friday, August 3, 2012

Recycled Denim

Three active little boys can burn through jeans like nothing! The knees are the first to wear out, at which point I cut them off into shorts. For some reason, I saved all those cut off leg pieces, along with other jeans that had worn out. This is what they turned into - a huge map of the USA! This covers the top of our queen-sized bed.

Here's how I did it: I used a poster of the USA and enlarged it 150% state by state. Then came the painstaking process. Cut out all 50 states, trace them onto Heat-N-Bond, iron onto the wrong side of the denim, and then cut each state out again. Heat-N-Bond is a miracle. Everything is ironed onto heavy twill, waiting for some messy free-motion quilting around each state! That will be my favorite part - I have some fun ideas for the oceans, too.

Wedding wrap up

The last 2 weeks of July were eclipsed with wedding preparations - I was asked to help decorate a wedding and reception hall, for over 300 guests! The bride's family had a ton of great ideas, and I was glad to help them bring them to life! It was a very eclectic, bohemian, woodsy wedding....lots of burlap, lace, twigs, glass votives of all sorts. Here's a quick glimpse (of course I forgot my camera! Photos were taken by Ahna Beth Photography - like her logo? I designed that too!)


Tuesday, July 17, 2012

Sketchbook on vacation

Just back from a 2 week trip which afforded me some much needed time to relax with my sketchbook. I finished up this drawing which I started at a wedding a few weeks ago (no, I don't draw during weddings! I attended the rehearsal and had nothing to do but sit in a pew and quietly occupy myself.) It was a beautiful church with a gorgeous stained glass window as the focal point. The pastor's closing benediction from Revelation was a wonderful way to end the wedding and inspired the text. This is done with Micron pens and watercolor pencils.


Wednesday, June 27, 2012

Fruit of the Harvest

Welcome to my kitchen! Today it's time to harvest the basil! Here's my little basil garden (and one calla lily towering in the background). I cut the basil down to about 1/3 of the height you see here. It should grow back to yield another crop later this summer.

The best part of harvesting basil - fresh pesto! Our family loves pesto over pasta, drizzled with a bit of EVOO. The only downside is that a lot of basil....

gives you such a little bit of pesto.
One little 4 oz. jar and a couple tablespoons (for grilled paninis for lunch).

Next year I need to plant twice as much basil and parsley. I start the basil from seed - what you see is up top is about 3/4 of a seed packet. I have a couple other pots that hold the rest, along with 2 parsleys I bought from Lowes. I haven't had as much luck starting that from seed so I just buy the plants. ;) Our deck is the only consistently sunny spot to grow anything, so I just do some small container gardening. This keeps the bunnies away, too! I love sitting on our deck and brushing my hand through the plants to fill the air with their aroma. It takes my mind out of the city for a few moments.

If you want to try your hand at making pesto, here's my recipe given to me by a good friend.

BASIL PESTO
1 cup firmly packed basil leaves
1/2 cup firmly packed parsley leaves
1/4 cup pine nuts, can be toasted
1/2 cup grated parmesan cheese
1 Tbsp lemon  juice
1 garlic clove, quartered
1/2 tsp salt
1/2 tsp ground black pepper
1/4 cup extra virgin olive oil

Put everything except the olive oil into a blender. Buzz it up until a paste forms. While the blender runs on low speed, slowly drizzle in the olive oil until the pesto has a consistency of soft butter (I didn't use the full 1/4 cup....maybe only half that). Pesto can be stored in the fridge for 2 days or frozen for later use.

Enjoy!

Friday, June 15, 2012

Art journal - camping


Thinking about an upcoming campout today. This started as a failed attempt at a crayon resist with watercolor, so I continued to fill the page with color, letting it run and generally being messy. Then my daughter accidentally leaned her arms across the wet page! No matter. I let it dry then the Sharpies and white-out pen joined in for a bit of a doodling and journaling session.

Monday, June 11, 2012

on fish and birds - again and again

Have you ever let yourself just doodle without really thinking? Basically just draw by gut instinct without worrying about the outcome? That's how this doodle developed. Our family was chilling out watching the "Andy Griffith Show" while my pen carried me away. There is something really satisfying about drawing a beautiful, curvy, thick/thin line! I know that sounds weird, right? I really got into those lines in the center of this drawing. They led me on a thought journey - the lines reminded me of waves, which reminded me of sea critters, which made me ponder how God might've felt while creating the myriad of sea creatures and birds on the fifth day of our little world's existence. And why did he choose fish and birds on the same day?? Why not fish and bugs? or birds and reptiles? I have no answer to that, but after drawing this, I see some related shapes and forms between them. Perhaps God was reveling in making those lovely organic curves. He didn't just make trout, but did the same thing over and over with countless variations on a theme. Minnows. Tuna. Salmon that turn colors. Clown fish. Moon jellies. Narwhals. Angler fish that light up. Flounders with eyes that move across their bodies.

That joy of repetition in something simple and sweet is best understood by little kids. Think about the last time your toddler begged you to push her on the swings at the playground. Over and over and over. Don't stop Daddy! We adults have forgotten the joy of beautiful repetition, instead we're often annoyed by it. Ugh, sin robs us of our joy again. Not today - those dish soap bubbles will be marveled over, the simple ingenuity of t-shirts appreciated while folding laundry. Thank you God for the joy of repetition - help me not get bogged down in it.


Thursday, May 31, 2012

Newly Spun Yarn!

I set myself to the task of spinning an entire braid of wool on my drop spindle in order to hone my skills (they need much honing!). I present 200 yards of yarn with a somewhat consistent diameter. The braid was purchased at the Allegan, MI wool festival in August 2010. The info tag is missing, but I think I remember this is Falkland wool???

 The colors remind me of peas and carrots!
This is a squishy, soft yarn. Despite some areas of unevenness and some overspun sections, I'm so happy with how it turned out! This will knit into some thing very warm for this winter - a hat or mittens perhaps?

Lest you think I have a quiet life where I can sit and spin while dreaming of great things, here's proof that you never know what the day will bring. My son gashed his leg at the beach and had to have 6 stitches - all the day before his birthday! Poor kid! But he was tough as nails and never flinched while the doctor was sewing him together. 
a birthday badge to remember his last day of being 7 yrs old

Friday, May 18, 2012

Development of a painting

This afternoon I holed up in my garage to work on a canvas that's been waiting for me for too long. Many years ago, when I first learned to use a brush, I used acrylics. They're easy to mix, have great coverage, and are pretty forgiving to work with. Somewhere about 10 yrs ago they got boxed up and put away. Today I dusted off the box and gave them another chance.

I thought you might enjoy a step-by-step (sort of ) showing the birth of this painting:

Hm......adding book pages was fun, but I can tell I'm used to using washes and watercolors! Can you believe I went thru 4 years of art school and this is the first canvas I've ever painted on!? No kidding! I'm not 100% pleased with this composition, but it was good practice for other techniques. I still have some ideas kicking around in my head that I want to try out, but first I need to replenish my paint supply. Most of my acrylics are not very good quality, and it was a bear to work with them. They felt sticky, goopy, ugh. Good tools make life much easier.


My husband loves it - must be the book pages featuring a conversation between Luther & Zwingli as well as a bit about Bucer. :) 

Friday, May 11, 2012

Maryland Sheep and Wool - the takeaway

The Maryland Sheep and Wool Festival came home with me - in a small way. 
I forced myself not to stop in or even look at the auction tent - I caught glimpses of beautiful spinning wheels and looms from the corner of my eye. Someday, the right spinning wheel will find me. It's like waiting for the right guy to show up in your life....much patience and restraint needed in the meantime!

There is sooooo MUCH YARN and other fiber goodness that one could blow their entire savings in a gluttonous frenzy. Aware of that, I decided to approach this festival like a museum curator - searching out just the right pieces that would round out my collection. I also took along an 8x11" bag and limited myself to whatever it could contain.

I've been trying to spin a bit more, both on my great wheel and the drop spindles, so some fiber was in order. The multicolored batt on the left seemed to have a well-combed preparation, perfect for the great wheel. The yellow ball is basic 100% merino. The bottom fiber is 100% silk - I was hunting for something new to tackle, and this silk called to me. Now to figure out how to spin it!


Black Laceweight Merino - for a gift. I suspect this JaggerSpun is a mill end, thus the handmade label.
 Malabrigo - oh how I love thy colors! One of my goals was to find a yarn I've never knit - and this famous brand fit the bill. I'm a bit wary about how a single will wear (pilling??). This will likely become a scarf or cowl for a gift.

 50/50 merino/silk "Solo Silk" from a vendor from Texas (I'm so bad at remembering names!). The colorway is a bit more subtle of a gray-neutral-cream than what the photo shows. I fell in love with a (free!) scarf pattern and decided to knit something for myself. I'm usually drawn to red or blue yarns, so picking this colorway was branching out for me. This is for the "try something that pushes my color envelope" category.

And some non-fiber goodness: heavenly delicious Maple Cream from Justamere Tree Farm (and the kids don't like it! Wahoo! It's all MINE!), an antique egg darner which will be put to good use, and ceramic buttons from Melissa Jean Designs to go with a sweater on my to-knit list.

Monday, May 7, 2012

Maryland Sheep & Wool Fest - Part 1

Saturday found me at the fairgrounds in West Friendship, Maryland for the annual Maryland Sheep & Wool Festival! Every form of wool was present, but first you had to fight the crowds. No worries, friends of sheep are quite pleasant to be around.
 Cuddly alpacas (did you know they hum? Hmmmm?)
Some very hard working sheep dogs (and very stubborn sheep)
 This is Fred, the sheep
 Brand new wool, um, I mean lambs, born that very morning, yet unable to stand - awww!
super cuddly angora rabbit - with nasty, pointy teeth! Just kidding, she was so calm her owner held her on her lap and spun the hair directly from the rabbit! I want one!

There were all forms of four-legged wool - didn't see any llamas, camels, bison, muskoxen, or yaks, though (but I did see the yarn made from them, even 100% dog hair yarn - ewww). I'll show you the products from these beauties in my next post. 


Sunday, April 29, 2012

Little Red Riding... beret??

Back to the knitting this weekend. This was a super fast and easy knit hat with a lace pattern just around the crown. The pattern shows the hat as a beanie or watch cap style, but I blocked it over a plate to give it some beret-like slouch. Tight fitting hats over big hair never work for me! I tend to look like the big bad wolf after pulling off a wool hat, but this one is pretty loose so I think it won't leave flat hat hair.

Old Fern Hat (Ravelry link)

frisbee? sea urchin? hat? 

It's very difficult to take good hat self portraits! 
Red hats are like a pair of red shoes.... every gal needs one

even Grandma sports it with style!

The yarn is basic but serviceable Lion  Brand Wool Ease. I think there's enough left in the skein to make a second one or a matching cowl in this lace pattern.